Every material must belong to the correct course
Before uploading anything, confirm the course title, subject code, section, term, and teacher account. Materials added to the wrong course can confuse students and may expose class content to the wrong group.
The Materials area is designed for resources students need to read, watch, download, or review. Assignments requiring student submissions should be created in the Assignments area rather than uploaded only as ordinary materials.
Do not upload confidential or restricted information
Remove private student records, answer keys intended only for faculty, passwords, personal contact information, and documents that students are not authorized to receive.
The course-material process
Open the exact subject, section, and academic term.
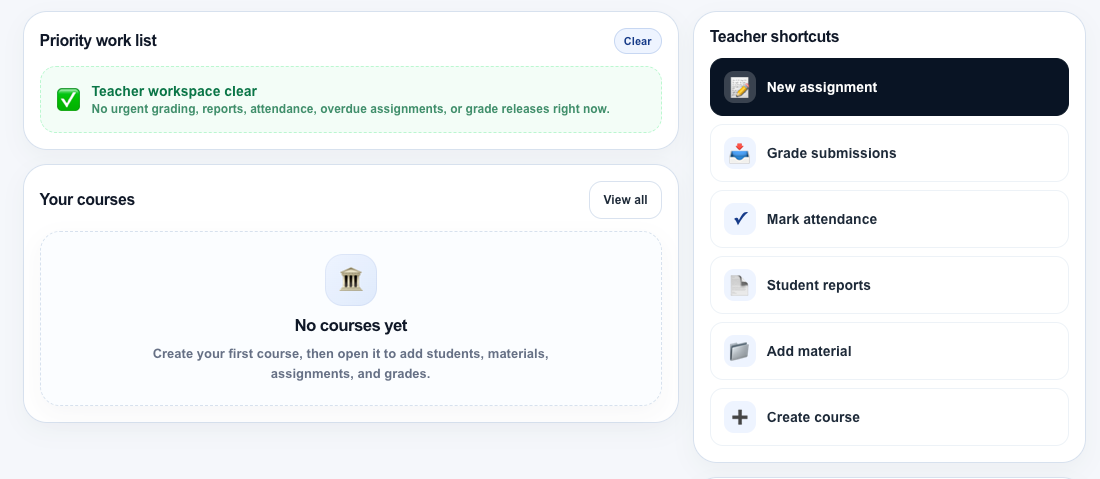
Open Materials or use the faculty dashboard shortcut.
Add a clear title, description, file, or valid link.
Save once and confirm the material opens correctly.
Before uploading course materials
Types of materials faculty can add
Files
Documents, presentations, worksheets, reading materials, images, and other course files saved on the faculty member’s device.
Links
Web pages, online references, videos, cloud documents, digital libraries, and other external resources students can open.
Instructions or notes
Short explanations that tell students why the material matters, what to study, or what they should do after reviewing it.
Use Assignments for work students must submit
A material can provide readings or instructions, but work requiring a deadline, upload, score, or feedback should normally be created as an LMS assignment.
Step 1: Open the correct course
Sign in with the approved faculty account
Open lms.mynorsu.social and confirm that the faculty name and role shown in the LMS are correct.
Open Courses
Select Courses and choose the exact course where the material belongs. Confirm the subject code, section, term, and year.
Open Materials or use Add material
Open the course Materials area. Faculty may also use the Add material shortcut on the teacher dashboard and then select the correct course when prompted.
Step 2: Complete the material information
| Course | Confirm the correct course before uploading. This is the most important check when using a dashboard shortcut. |
|---|---|
| Title | Use a specific name students will recognize, such as “Week 2 Reading: Data Structures” rather than “Document 1.” |
| Description | Explain what the resource contains, what students should review, and whether it supports a lesson, activity, or assignment. |
| File | Select the final file from your device. Wait for the upload to finish before saving or leaving the page. |
| Link | Paste the complete web address when adding an online resource. Open the link in another tab first to confirm it works. |
| Order or placement | When the LMS provides an ordering option, place materials in a sequence that matches the course schedule or learning unit. |
Use clear file names and titles
Students often download materials to phones where several files may appear together. Clear names reduce confusion.
- Use the subject, topic, week, or module in the file name.
- Include a version or date only when it helps distinguish revisions.
- Avoid names such as final-final, untitled, scan001, or document.
- Do not place private student names or identification numbers in shared file names.
- Use the same naming structure throughout the course.
Example of a clear material
Title: Week 3 Lecture Slides: Database Fundamentals
Description: Review these slides before the next class. Focus on tables, primary keys, and relationships.
File: IT101-Week-03-Database-Fundamentals.pdf
Step 3: Save and verify the material
Review the title and course
Confirm that the resource is being added to the correct course and that students can understand the title without opening the file.
Wait for the upload to finish
Do not close the browser, refresh the page, or navigate away while the file is still uploading.
Select Save once
Click the save or add button once and wait for confirmation. Repeated clicks can create duplicate materials.
Open the saved material
Return to the Materials list and open the resource. Confirm that the file downloads or the link opens and that the correct title and description are shown.
Keep the course Materials area organized
- Arrange resources by week, unit, module, or topic.
- Use consistent titles across the entire course.
- Remove obsolete or incorrect versions.
- Do not upload the same file repeatedly unless the revision is clearly identified.
- Separate reference materials from graded assignments.
- Check links periodically because external pages may move or be removed.
Common material-upload problems
The wrong course was selected
Remove the misplaced material when permitted and add it to the correct course. Confirm the subject and section before uploading again.
The file does not finish uploading
Check the internet connection, confirm that the file opens normally on the device, and try again without refreshing repeatedly. A very large or damaged file may need to be compressed or recreated.
Students cannot open the link
Test the link in a private browser window. Some cloud files require permission changes before students can access them.
The material appears more than once
Keep the correct version and delete the duplicate. Repeated save clicks or uploading the same resource twice can create duplicate entries.
The wrong or outdated file was uploaded
Replace or remove the incorrect material promptly. Use a clear revision label when students need to distinguish the corrected version.
There is no delete function visible
Open the course Materials area and review the controls attached to the specific material. Deletion controls may appear only to the faculty member or authorized course manager who owns or manages the course.
What to include when requesting help
- Your faculty name and account email.
- The course title, code, section, and term.
- The material title.
- Whether you were adding a file or a link.
- The file type and approximate size when a file fails.
- A screenshot of the error with private information hidden.
- The device and browser being used.
Send technical concerns to support@mynorsu.social. Never send your password or private student records.
Final material check
The material is ready for students when all of the following are true:
- It was added to the correct course and section.
- The title clearly identifies the resource.
- The description explains how students should use it.
- The correct file or link is attached.
- The saved material opens successfully.
- No private, restricted, duplicate, or outdated content is included.